3 Easy Ways to Start Using PowerCLI

If you are a sysadmin you hopefully are leveraging PowerShell to manage a variety of tasks in your environment such as setting up scheduled tasks, managing users in Active Directory, managing Exchange Online, and gobs of other things.
PowerShell gives us so many modules to manage these resources — and make our lives so much simpler by way of automation and efficiency. Eventually, your PowerShell journey will lead you to discover that you can take a lot of what you already know about PowerShell and use it to manage your VMware environment, including how to:
Use PowerCLI to inventory your infrastructure
Easily update VMware Tools
Running scripts on schedules
PowerCLI could very easily become the next sharpened tool in your administration arsenal. Here's how to get started.
What is PowerCLI?
PowerCLI is a suite of PowerShell modules that manages an array of VMware products and services. VMware PowerCLI is packaged with hundreds of easy cmdlets to manage your infrastructure on a global scale, including managing and automating vSphere, vCloud, vRealize Operations Manager, and VMware Horizon environments. PowerCLI version 1.0 was released circa summer of 2008 and started with an estimated 120 cmdlets. Fast forward to version 12, which was just released in April of 2020, which now touts over 700 cmdlets!
The creators of PowerCLI specifically and intentionally designed the resource to be a natural extension of the foundation laid by PowerShell. That easy-to-remember verb-noun syntax makes the learning curve so much easier if you have a strong foundational understanding of PowerShell. Let's get a little more familiar with what it can do by giving you some simple examples to use right away in your environment. This will be focused on a standard VMware cluster and interacting with the guest VMs hosted within.
How to Get Started with PowerCLI
To get started with PowerCLI, you'll need to add the module into your PowerShell arsenal. Otherwise, the Get-Vm cmdlet won't do much for you. I suggest using the official VMware Docs resource as a field guide to installing the module. You can install this on your vCenter Server instance or on your own workstation.
If you have any older PowerCLI versions like 6.x and earlier, they will need to be removed from the traditional Programs and Features area on your Windows machine. Be sure to be connected to the internet as the module needs to be pulled down from an online repository. Also, make sure Windows Management Framework 5.1 is installed if you are working on a Windows 7/8/Server 2012 R2 or earlier OS.
Open a PowerShell window as an administrator and enter:
Install-Module VMware.PowerCLI
You may get prompted to install a dependency called NuGet as well as getting asked to install from an untrusted repository. Confirm these with a 'Y'.
You may also want to change your station's local script policy. Feel free to make this setting as you need for your environment.
Set-ExecutionPolicy RemoteSigned
This command will opt out of the Customer Experience Improvement Program and will ignore any certificate warnings when using PowerCLI. It is a bonus to know that if your organization relies heavily on internal certificates, PowerCLI provides this extra layer of security to keep your Security Operations staff happy.
Set-PowerCLIConfiguration -InvalidCertificateAction Ignore -Confirm:$false -ParticipateInCeip $false
If you have installed the PowerCLI module previously but think it may need to be updated, you can check the version and/or update it by using the:
Get-Module -Name VMware.PowerCLI -ListAvailable
Update-Module -Name VMware.PowerCLI
At this point, the latest version of PowerCLI is running, and you are ready to peer behind the veil of the clunky vCenter interface and really dig into the guts of your environment. To do this, you need to connect to your cluster using the FQDN:
Connect-VIServer -Server “cbt1.cbtnuggets.com”

There are plenty of other options for connecting to your cluster, such as passing the username/password or using stored credentials. Check out the ways to connect using the Connect-VIServer page in the PowerCLI reference resource. Remember, because this is all PowerShell, you can set variables for the connection information if you wish for further scripted automation.
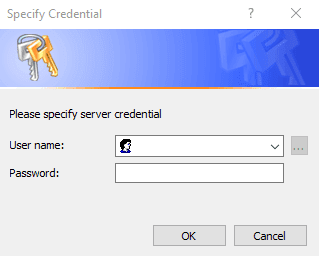
Once your credentials are entered and accepted, you will enter an open session on PowerCLI within your cluster. The cluster name, port, and username are listed in the console window.
Easily Inventory Your Environment
Because technology moves incredibly fast, operating systems are falling out of support just as quickly. Because of this, you may have migration projects that require you to either mitigate legacy VMs running an older OS or replace them completely. You may just need to refresh some documentation on the OS footprint that exists in your VMware environment.
To pull the OS information from a particular guest VM, you could use the following (which will output just the name and the 'OSFullName' property on the VM):
Get-VM -Name MyGuestVM | Get-VMGuest | Select VmName,OSFullName
If your cluster has multiple data centers, usually distinct by location, you can prepend these cmdlets with Get-Datacenter -Name MyLocation and pipe that through to Get-VM and then the rest of the line.
The beauty starts to shine here, as you can now implement all the sorting and filtering you know and love with PowerShell. That syntax carries over very well when targeting specific resources. For instance, if you want to report on the number of guest VMs that are running and the version of Windows Server 2008, you could use something like this:
Get-VM | Get-VMGuest | Where-Object {$_.OSFullName -like ‘Microsoft Windows Server 2008*’} | Select VmName,OSFullName | Export-Csv -Path C:\Temp\Server2008-Listing.csv -NoTypeInformation
Notice that the output is piped into a .csv using the -Export-Csv cmdlet. This way, you can document and use the information for reporting.
Let's say Security Operations is cracking down hard on the presence of any Windows 2003 servers in your environment, and you know that you have some, but not all of them are actually running or powered on. You may be keeping them around for data retention purposes, or you are waiting to hear back from a development team with confirmation to delete a VM that is powered off, and you want to see what is powered on or powered off. You would enter something like:
Get-VM | Get-VMGuest | Where-Object {$_.OSFullName -like ‘Microsoft Windows Server 2003*’} | Select VmName,OSFullName,State | Export-Csv -Path C:\Temp\Server2003-Listing.csv -NoTypeInformation
As you can see, once you start to familiarize yourself with the properties of the objects within PowerCLI, you can use your PowerShell foundational knowledge to create extensive and granular outputs that will give you much better visibility into your environment.
Easily Update VMware Tools
As you are navigating inside of vCenter, you will eventually start to see a growing trend of the dreaded notification: "A newer version of VMware Tools is available for this virtual machine." After grunting and thinking, "Didn't I just do this for these VMs?" you go through the click-heavy steps to manually update the VMware Tools on the VM. It would be well worth the time to develop a strategy to roll out VMware updates at scale and keep VMware Tools level-set across the environment.
Using some of the previous section's filtering, you can get a listing of the guest VMs that are running (powered on) and their respective VMware Tools version:
Get-VM | Get-VMguest | Where {$_.State -eq ‘Running’} | Select VmName, ToolsVersion
This will quickly show you the Heinz variety of VMware Tools versions scattered throughout your cluster. Don't panic, though! With PowerCLI, you can easily deploy VMware Tools to the entire cluster with just a few cmdlets.
The first thing you will need to do is to scope out the guest VMs that are tagged with the property GuestToolsNeedUpgrade and export that list of VM names to a .csv file:
Get-VM | Get-VMGuest | Where-Object {$_.State -eq ‘Running’ -and $_.ExtensionData.ToolsversionStatus -eq ‘GuestToolsNeedUpgrade’} | Select VmName | Export-Csv -Path C:\Temp\vms2update.csv -NoTypeInformation
Once you have the .csv output, you can use it to deploy the latest version of VMware Tools hosted native to your cluster. There's no need to find an installer from My VMware or any other deployment resources. PowerCLI has a way to deploy the matching VMware Tools package that is most up-to-date with your current environment version. So, the same version that gets installed when you click inside vCenter to update VMware Tools is the same version that will get installed via Power CLI:
$VMs = Import-Csv C:\Temp\vms2update.csv
$VMs | % { Get-VM -Name $_.VmName | Update-Tools -NoReboot}
This will start the update process on each VM, suppressing the reboot action that normally follows an update to VMware Tools. It is recommended to test this process extensively in your environment. There is documentation that states, depending on some variables, that some guest VMs may still reboot after the Tools update.

So now the VMware Tools will be updated one at a time on each VM in your .csv. There is a progress bar, but the functionality of this component may not be reliable as most people have observed that it jumps from 0% and sits for a few minutes, then jumps to 99% and then right back to 0%. It can be assumed that the process is chunking through the list of VMs in the .csv file.
Knowing the ease of this process, now you can utilize the inventory section with this and develop a repeatable plan for VMware Tools upgrades in your environment during regular scheduled maintenance windows.
Digging Deeper into PowerCLI
Now that you've gotten just a tiny slice of a few of the things that PowerCLI can do for you, the ball is in your court. As you dig into the myriad of ways to inventory your environment, you can start to learn how to harvest information more efficiently using various flavors of some of the PowerCLI components along with fundamental PowerShell best practices to take the next step toward automating specific tasks in your cluster.
Furthermore, as you streamline the tools update process, you can start to move toward automation of the update process by running scripts on schedules and allowing your non-critical VMs to get updated as the cluster gets upgraded. This allows you to focus on the critical parts of your infrastructure that sometimes need more attention.
delivered to your inbox.
By submitting this form you agree to receive marketing emails from CBT Nuggets and that you have read, understood and are able to consent to our privacy policy.